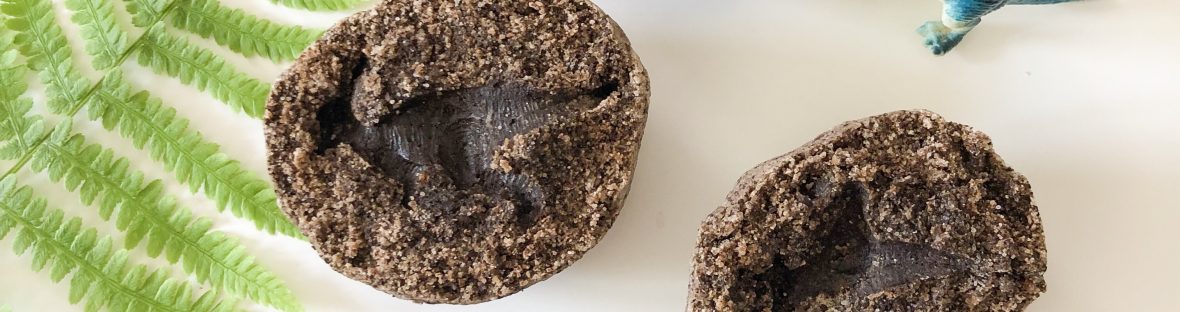
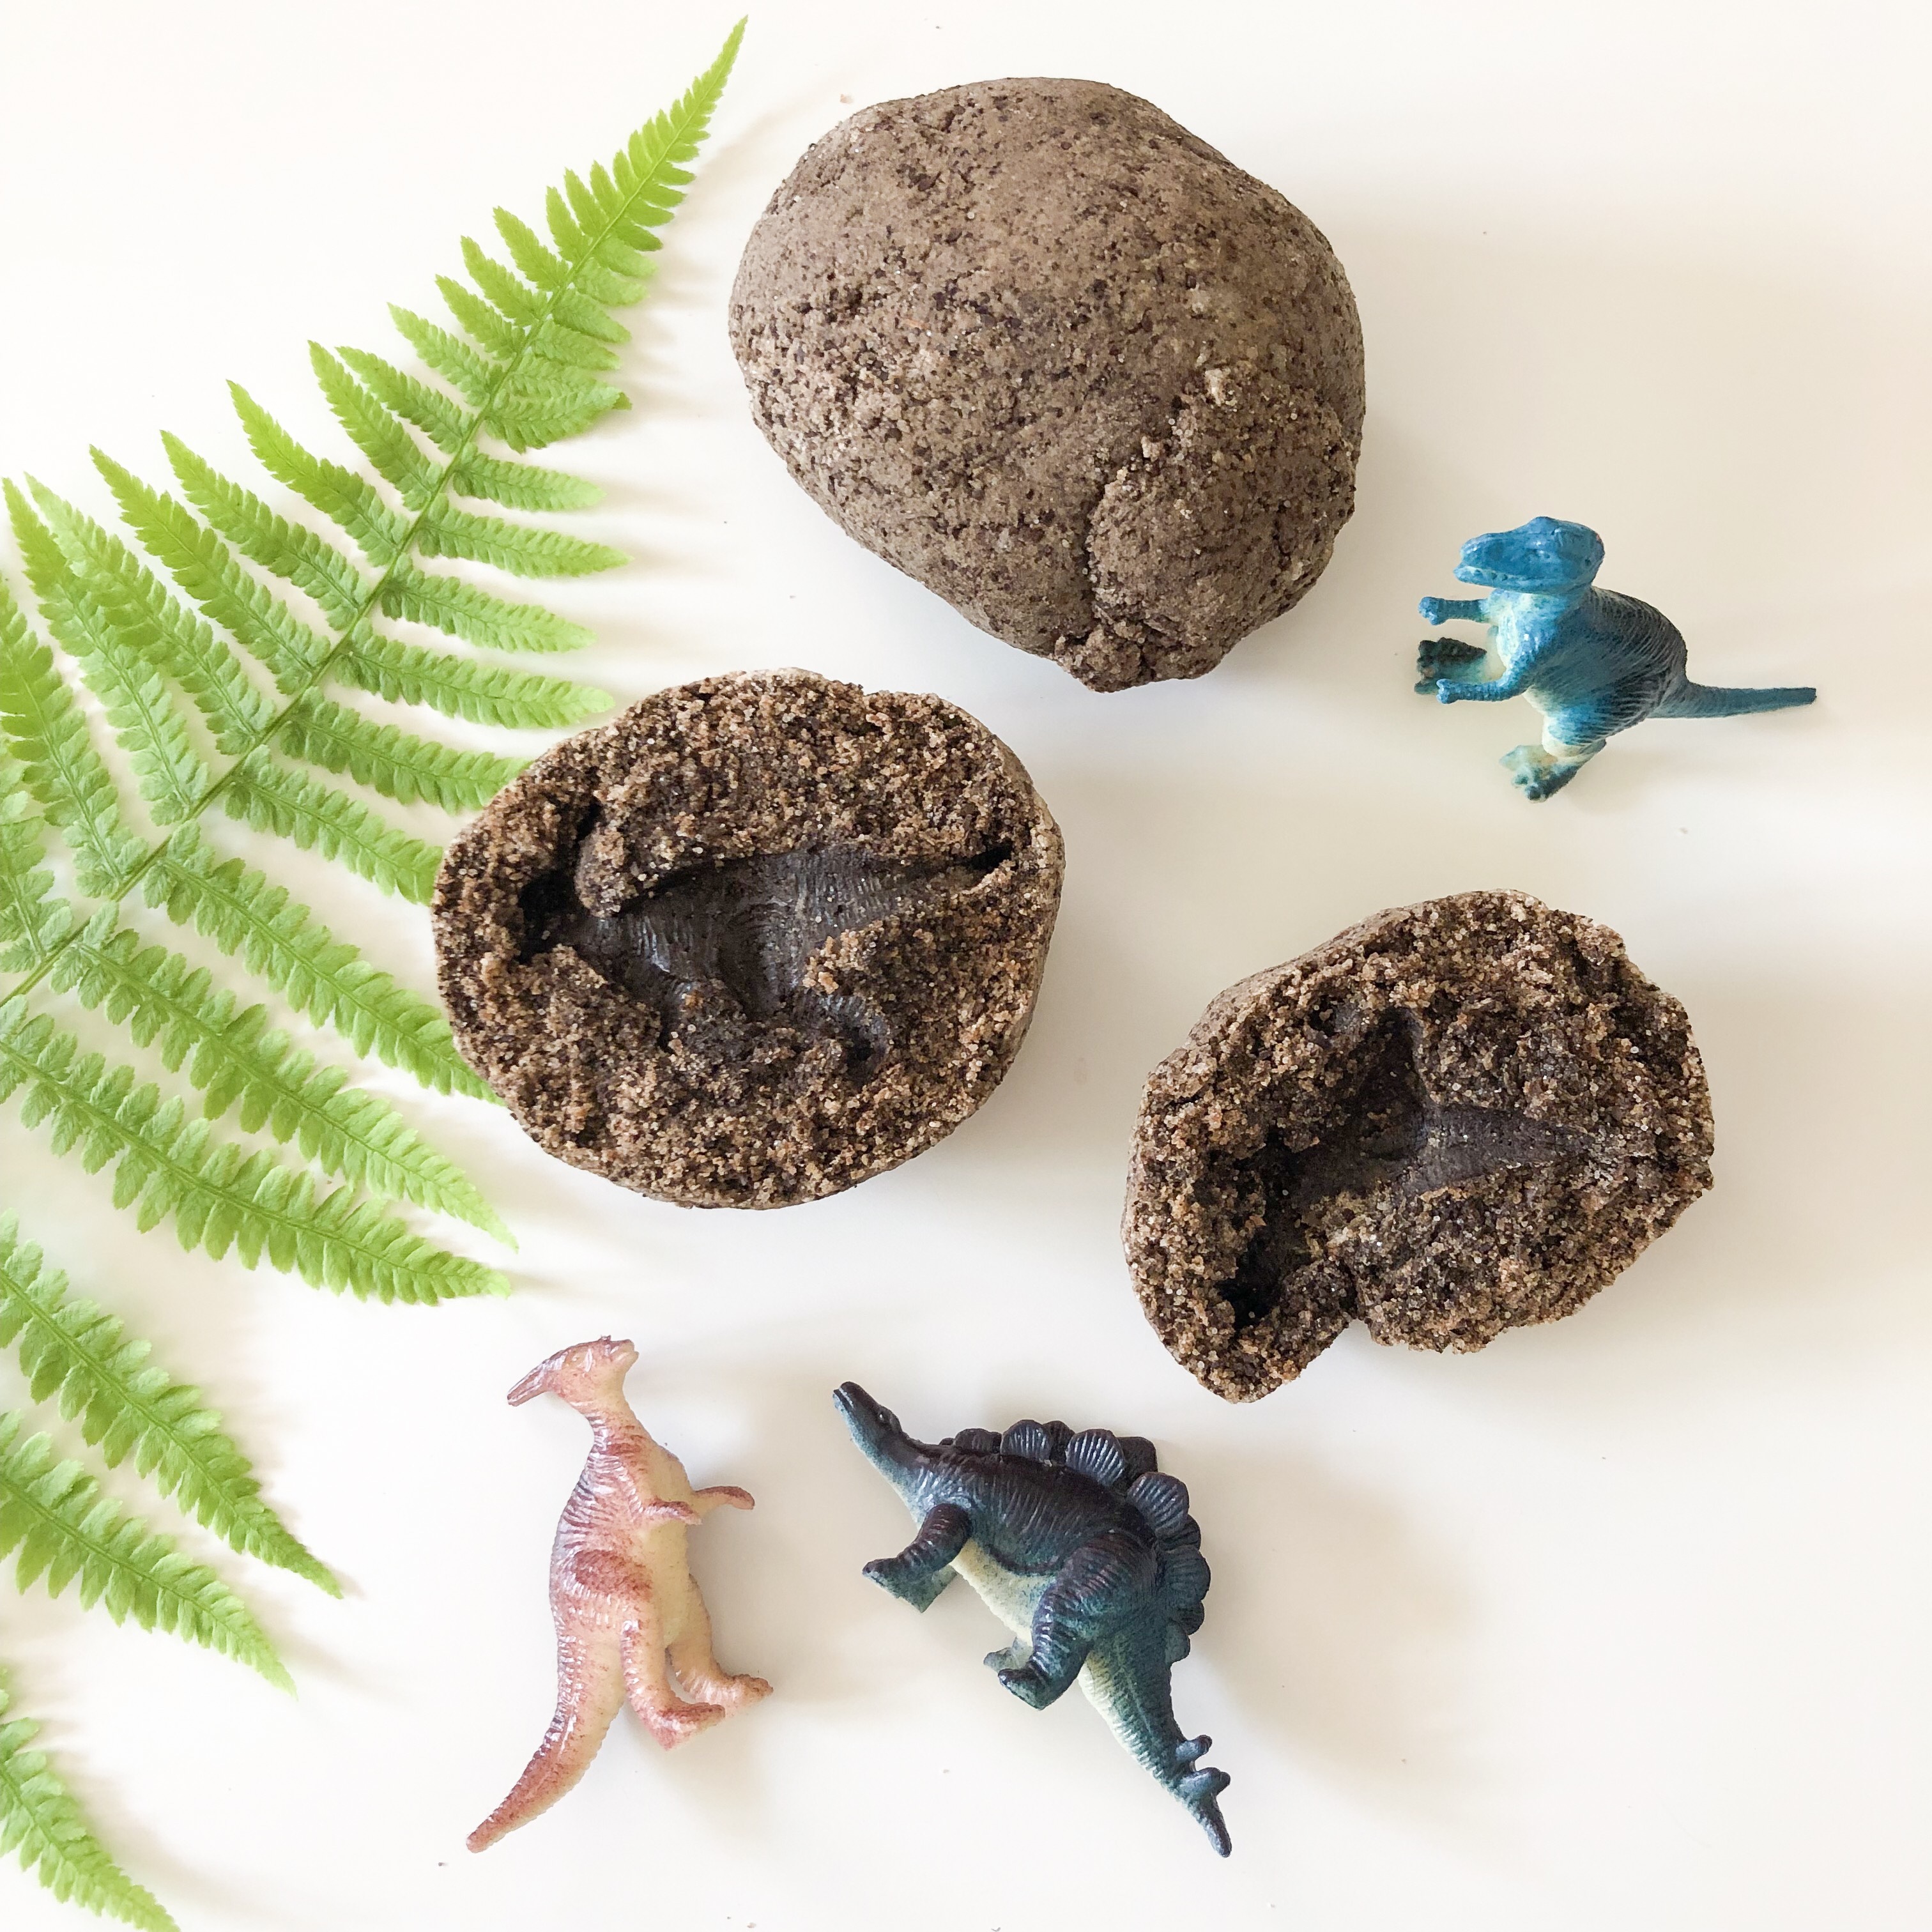
My oldest is turning 3 this summer and is starting to explore, question, and appreciate investigative activities. Since we recently saw a dinosaur exhibit at the Canadian Museum of Nature, I thought it would be fun to continue exploring dinosaurs at home with this fun fossil activity. These fossils look like rocks or eggs, and can be cracked or crumbled open revealing a mini dinosaur. Depending on how you open it, you may be left with a dinosaur imprint to keep as a fossil.
I originally saw this activity on Pinterest using a simple salt dough recipe. Unfortunately the first batch didn’t really work out as nicely as I expected. They flattened out in the oven and even though the exterior dried, they were gooey and gross on the inside. I made a few changes to the original recipe and had way more success. The mixture is super simple and uses ingredients you already have in your kitchen.
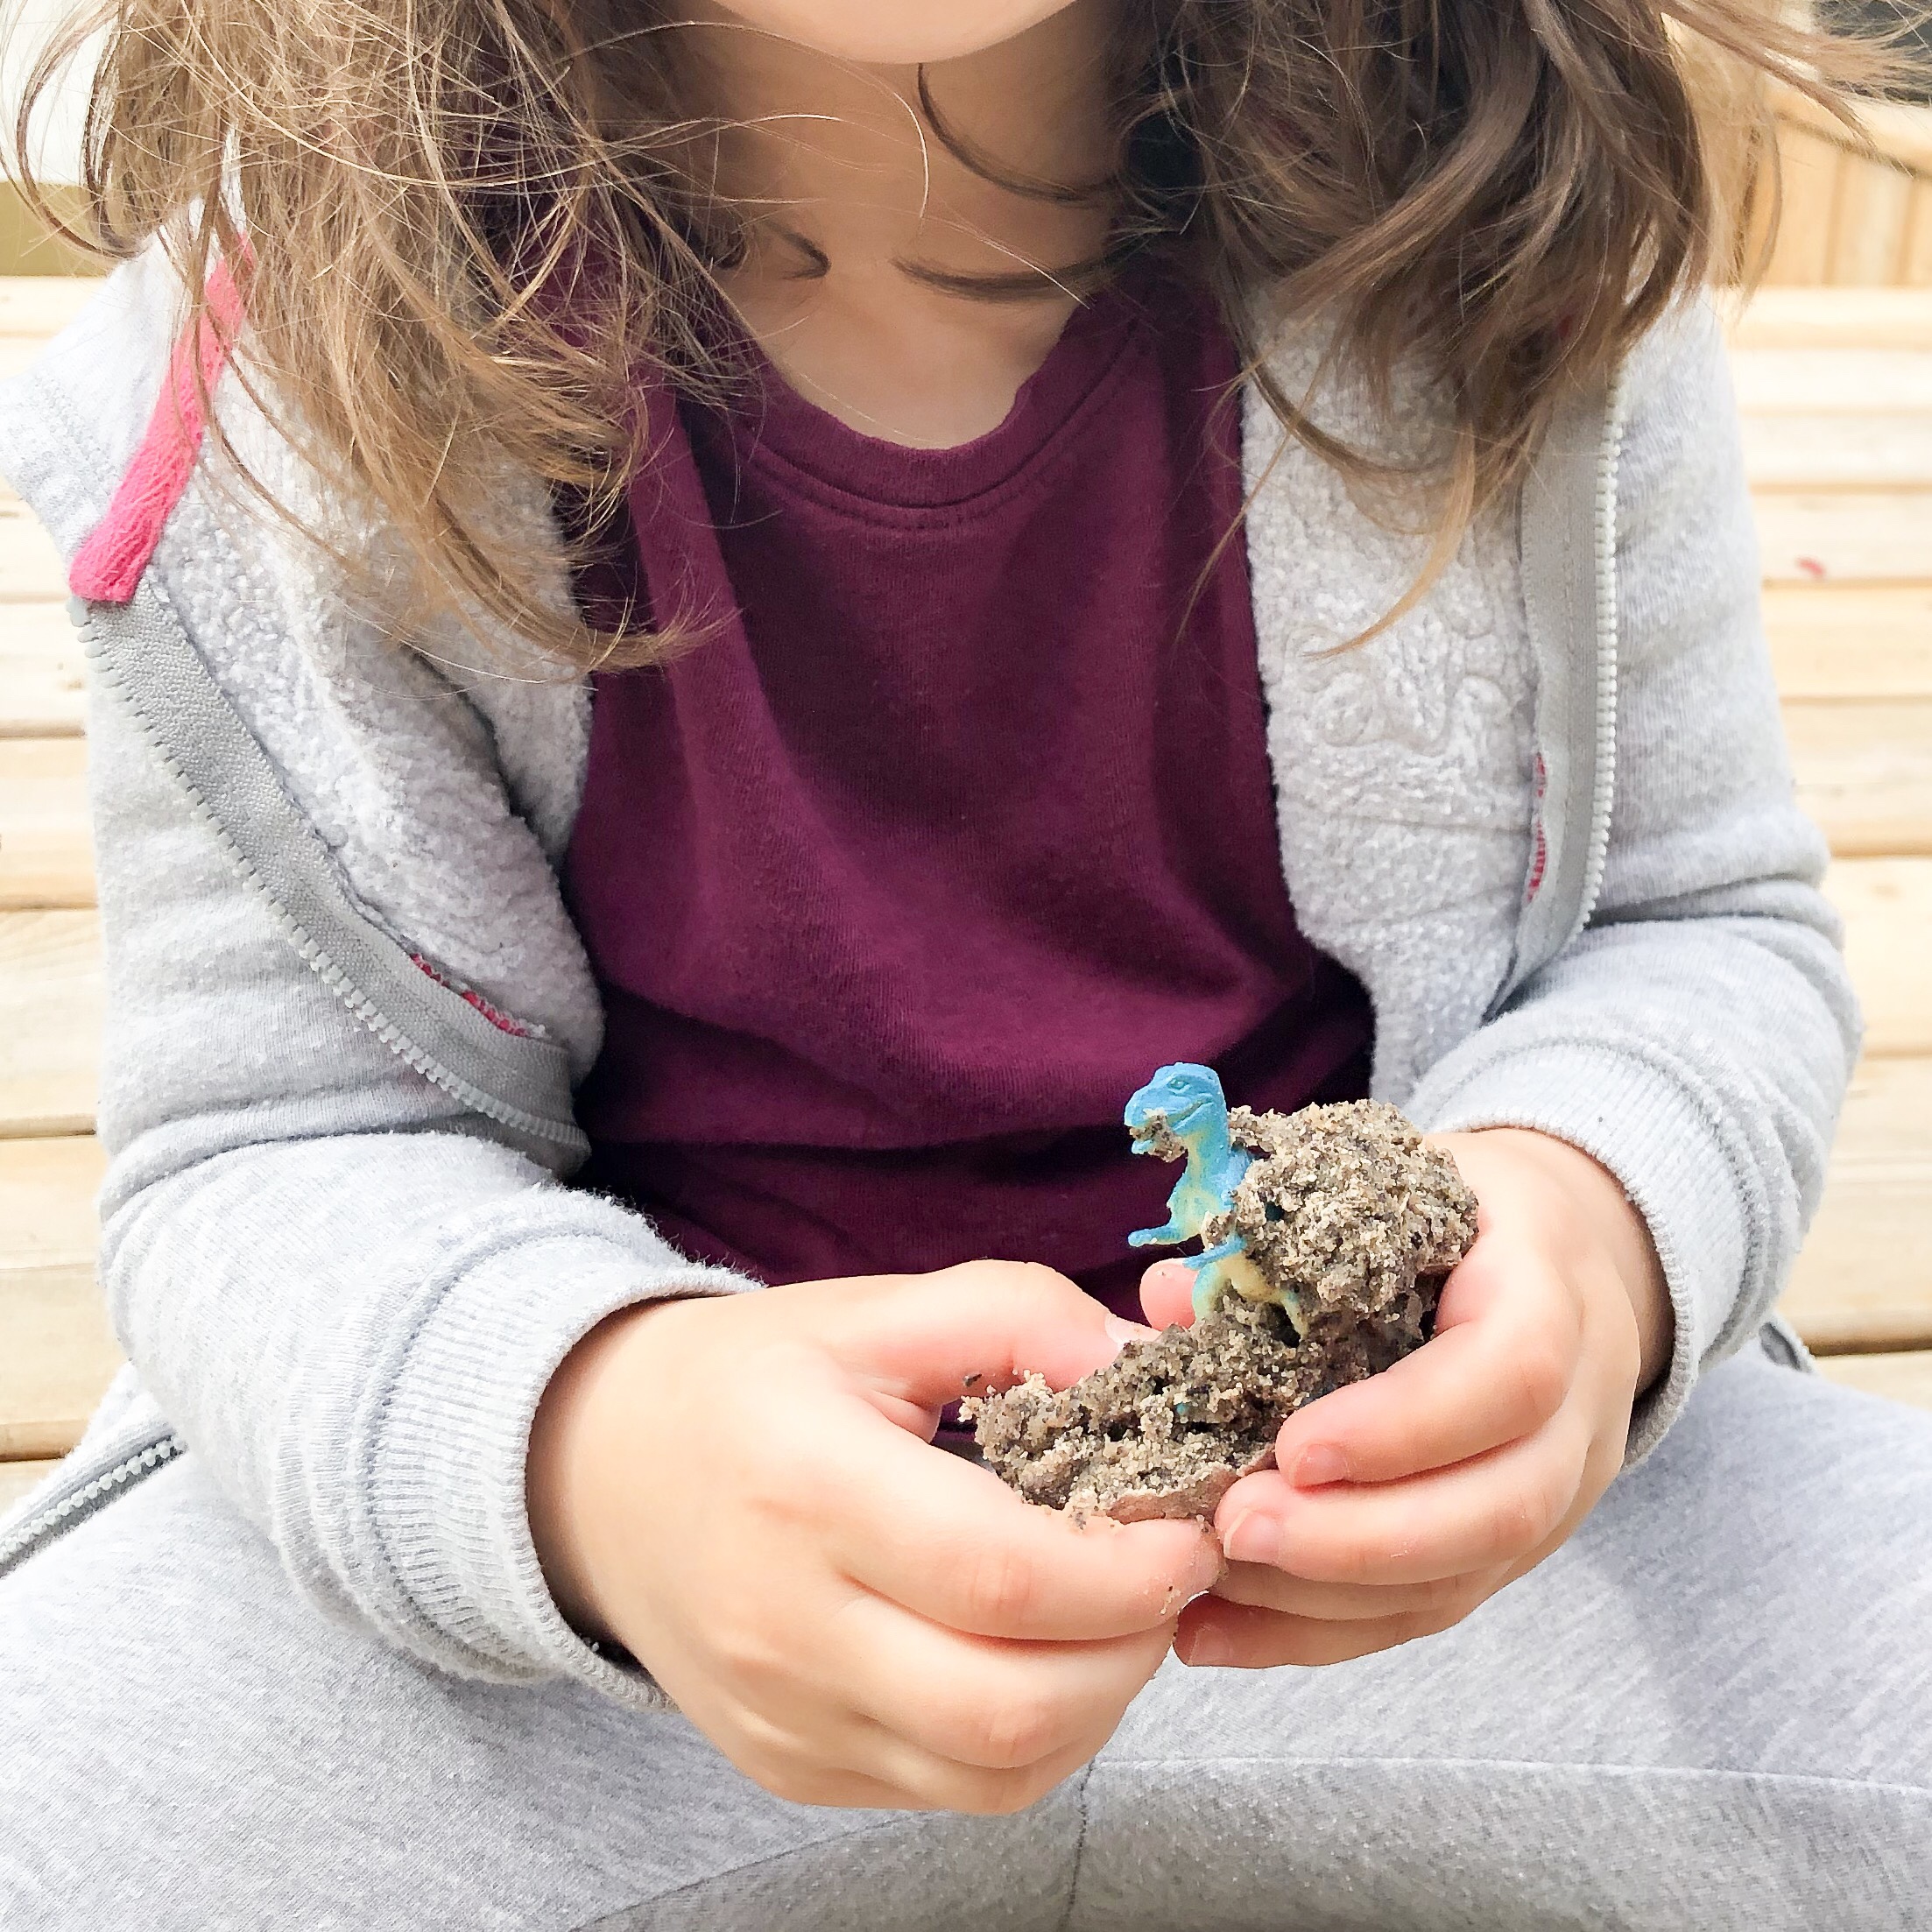
My daughter loved crumbling open the rocks and playing with the leftover rock pieces.
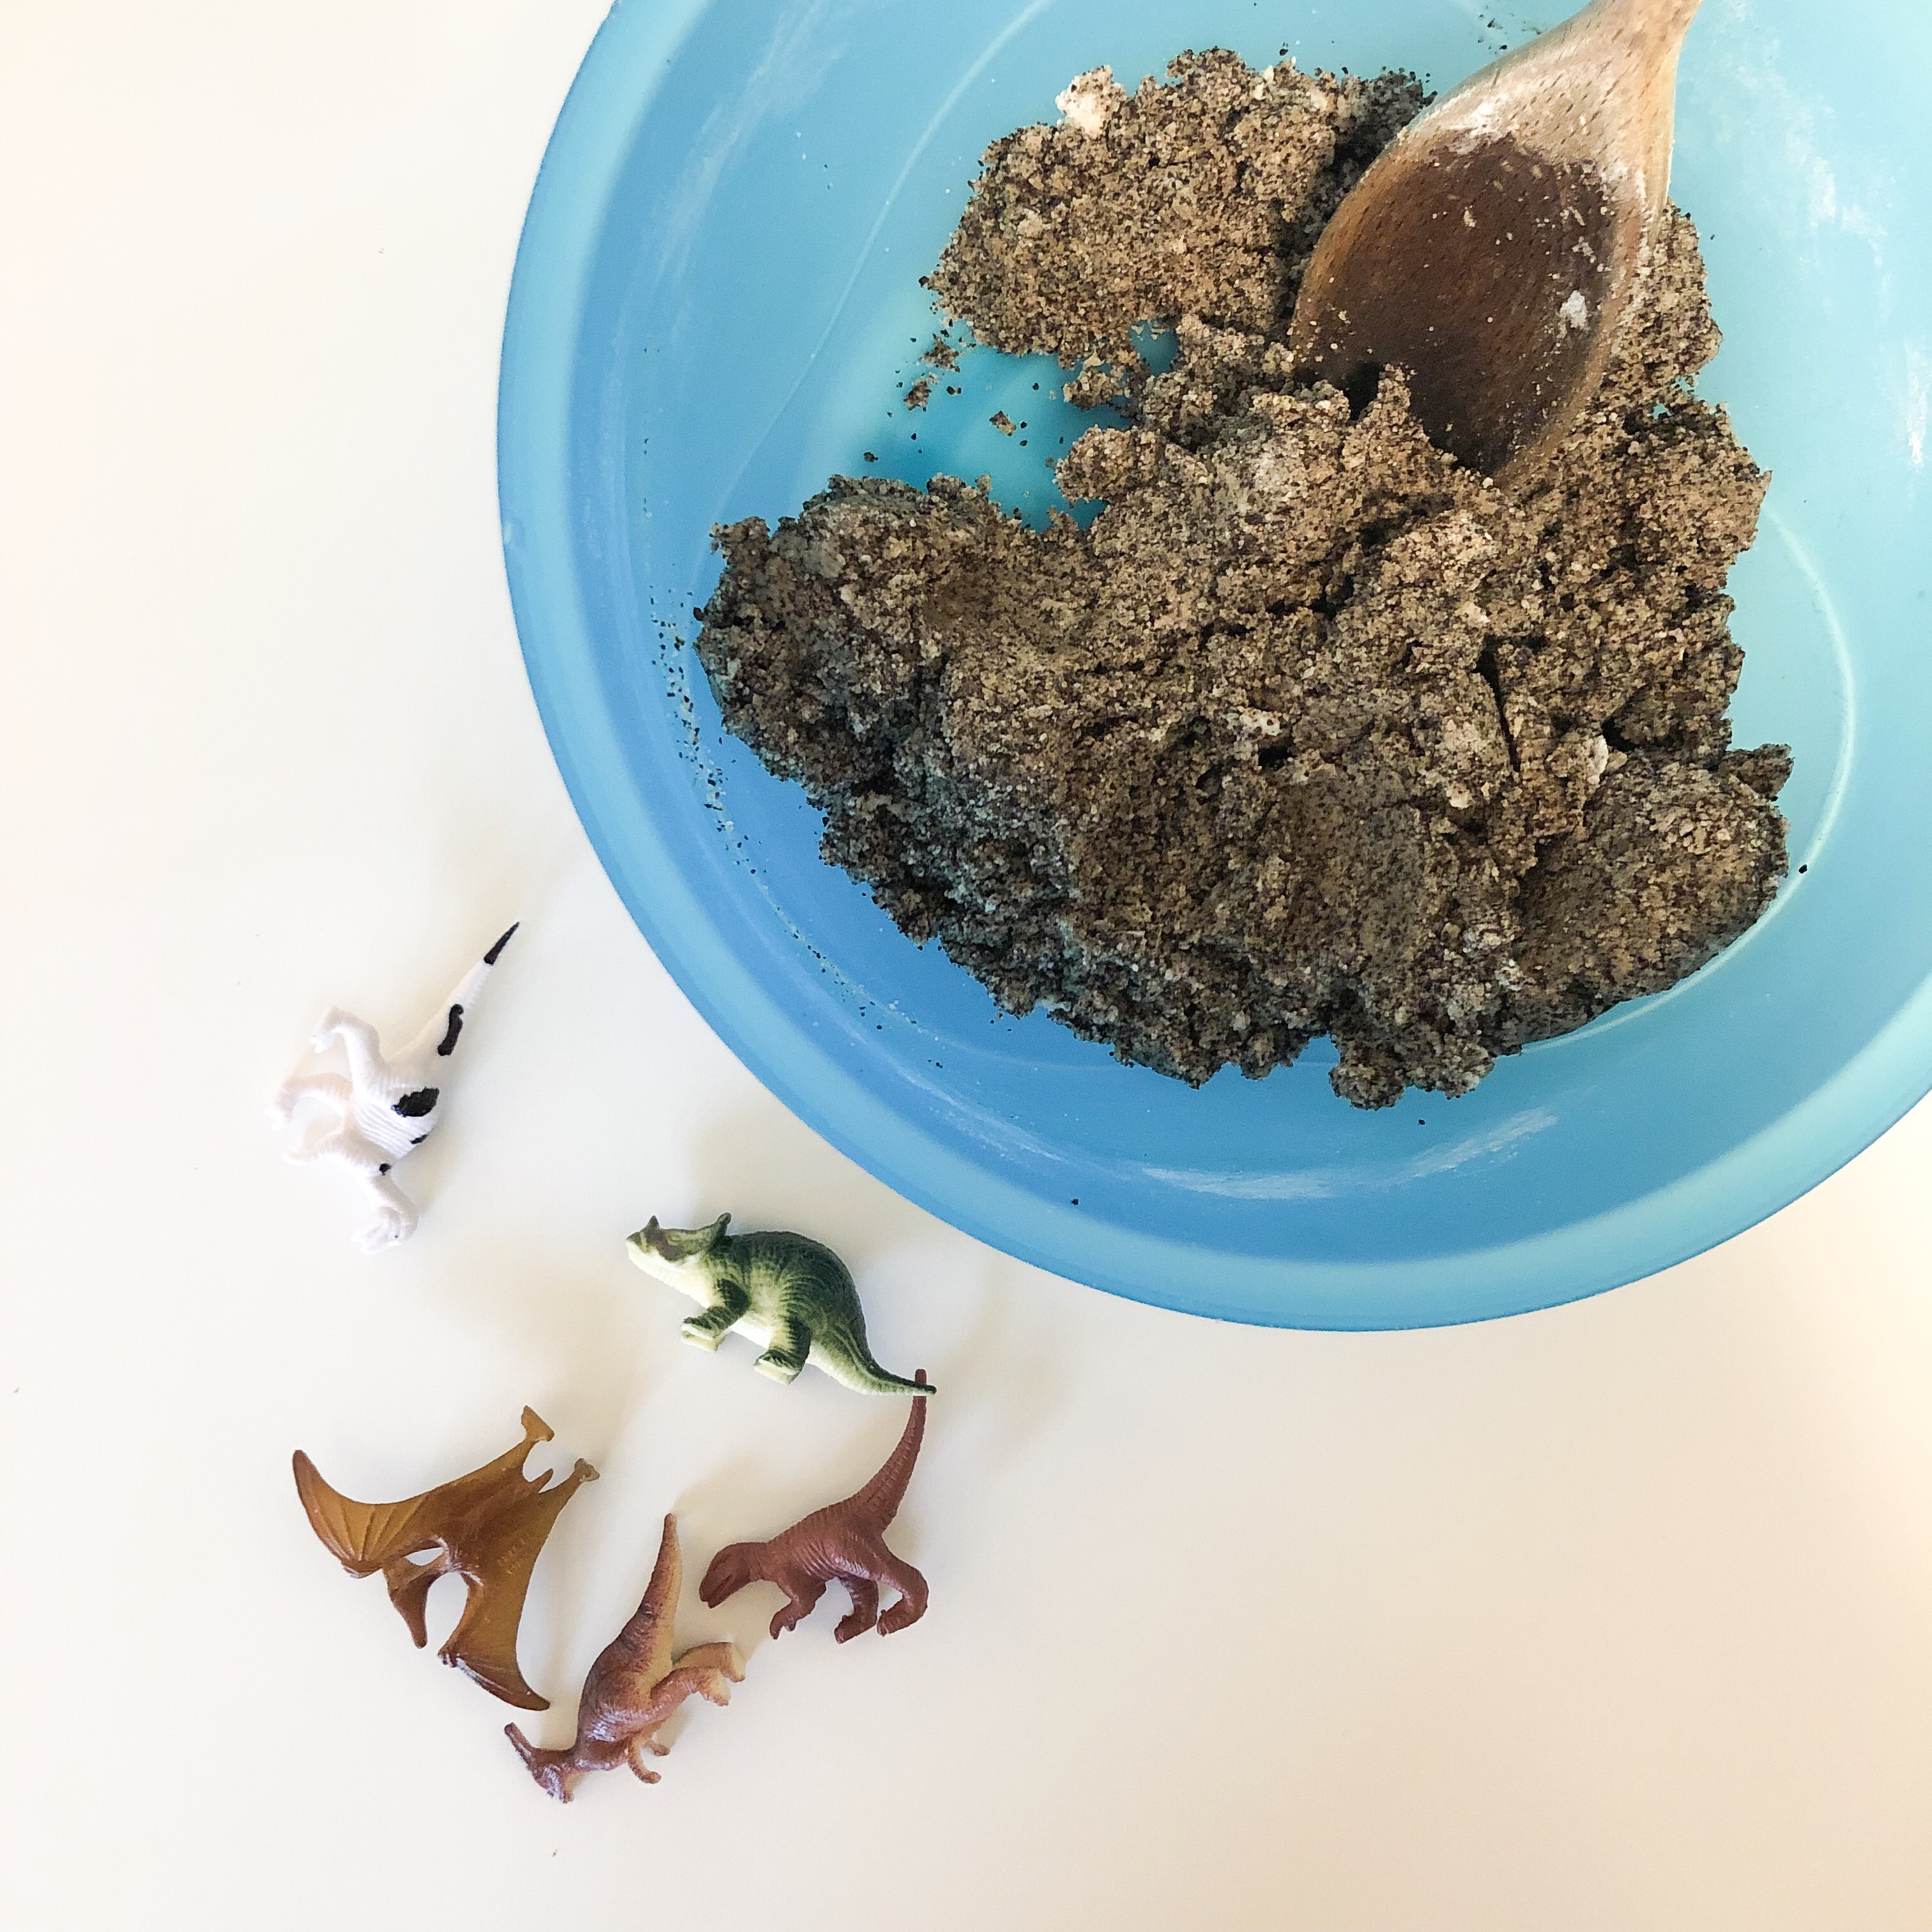
Here’s what you need to get started:
1 cup flour
3/4 cup salt
3/4 cup leftover coffee grounds
*1/2 cup water
small plastic dinosaurs
Start by measuring out your flour, salt and coffee grounds into a large bowl. The coffee grounds and salt give these fossils a great rock-like colour and texture. Using leftover coffee grounds means less waste, but they add water content to the recipe, so *1/2 cup of water is really a guess. I recommend adding small amounts of water to the mixture at a time, until it begins to stick together. You may end up using more or less than 1/2 cup of water. Continue stirring and adding water a little at a time until the mixture resembles crumbly damp sand. It should stick together when squeezed in your hand.
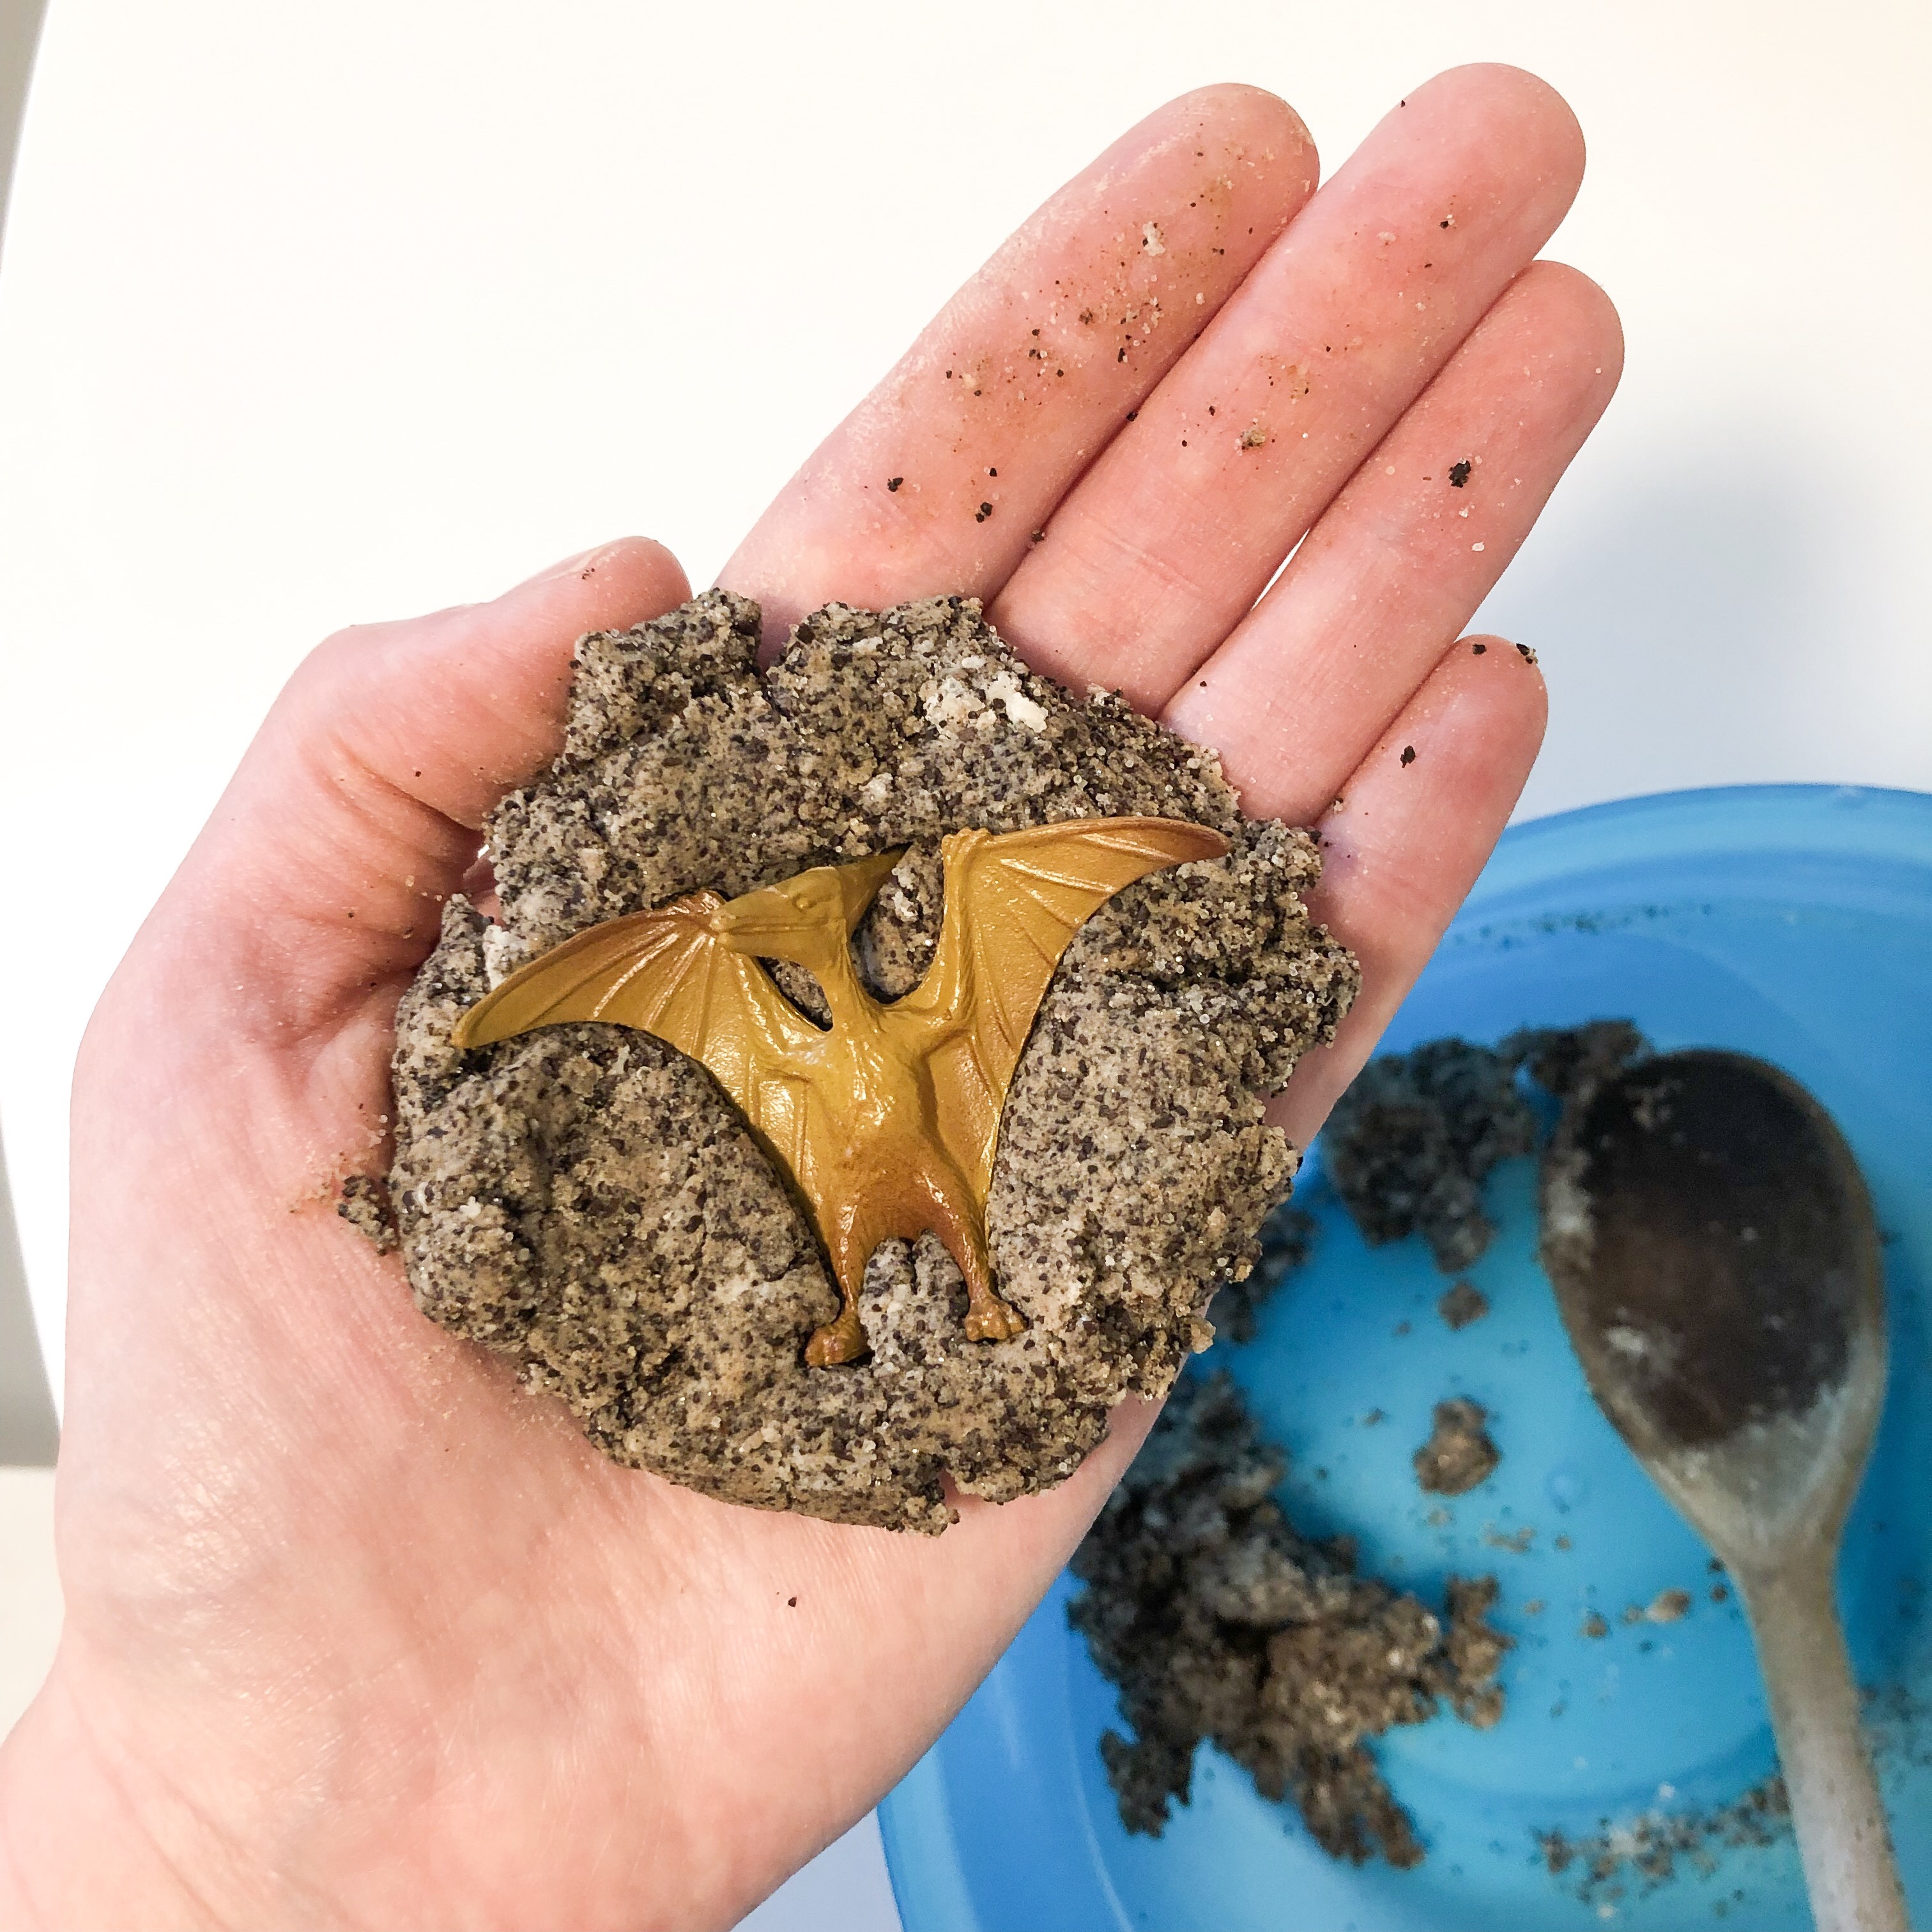
Now the fun part. Grab a large spoonful of dough and press a mini dinosaur in the center. Work the dough around until the dinosaur is completely encased, pressing the dough together into a rock shape. Place your rocks on a lined baking tray, and bake in the oven at 200°F for approx an hour. Alternatively you can leave them out to dry in a safe place over a few days.
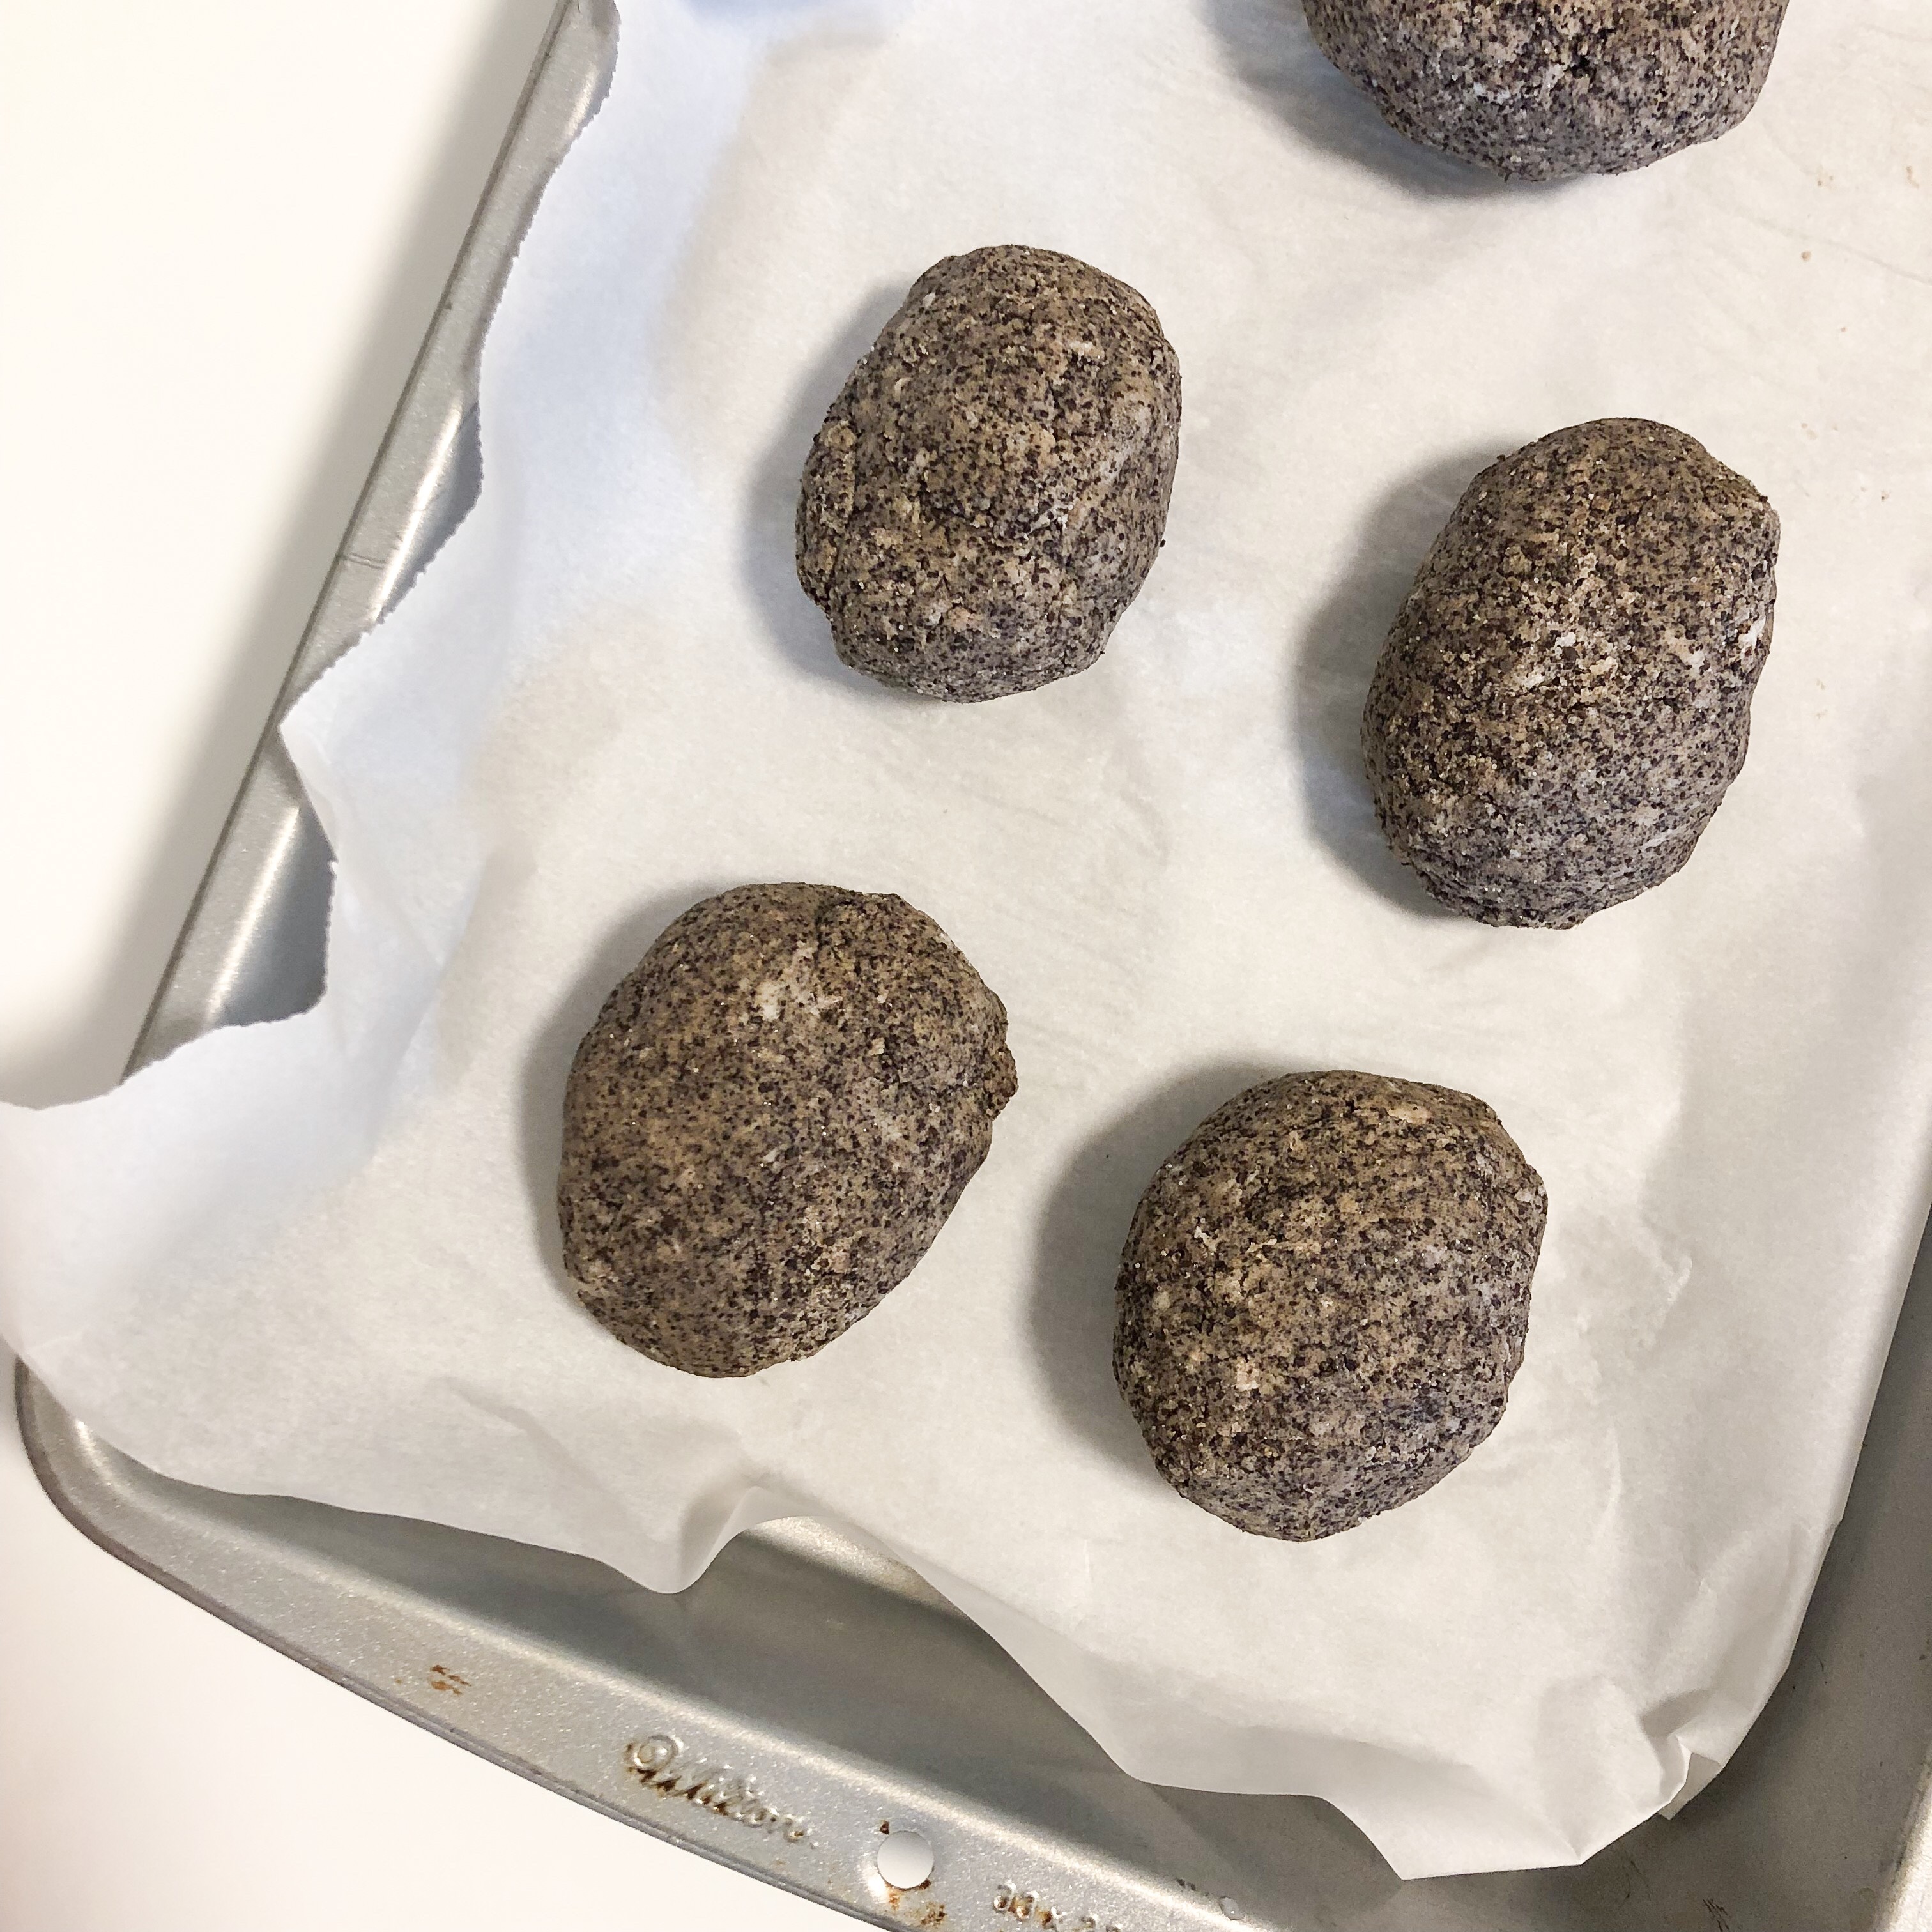
I baked these and then let them sit out for about 3 days before giving them to my daughter.
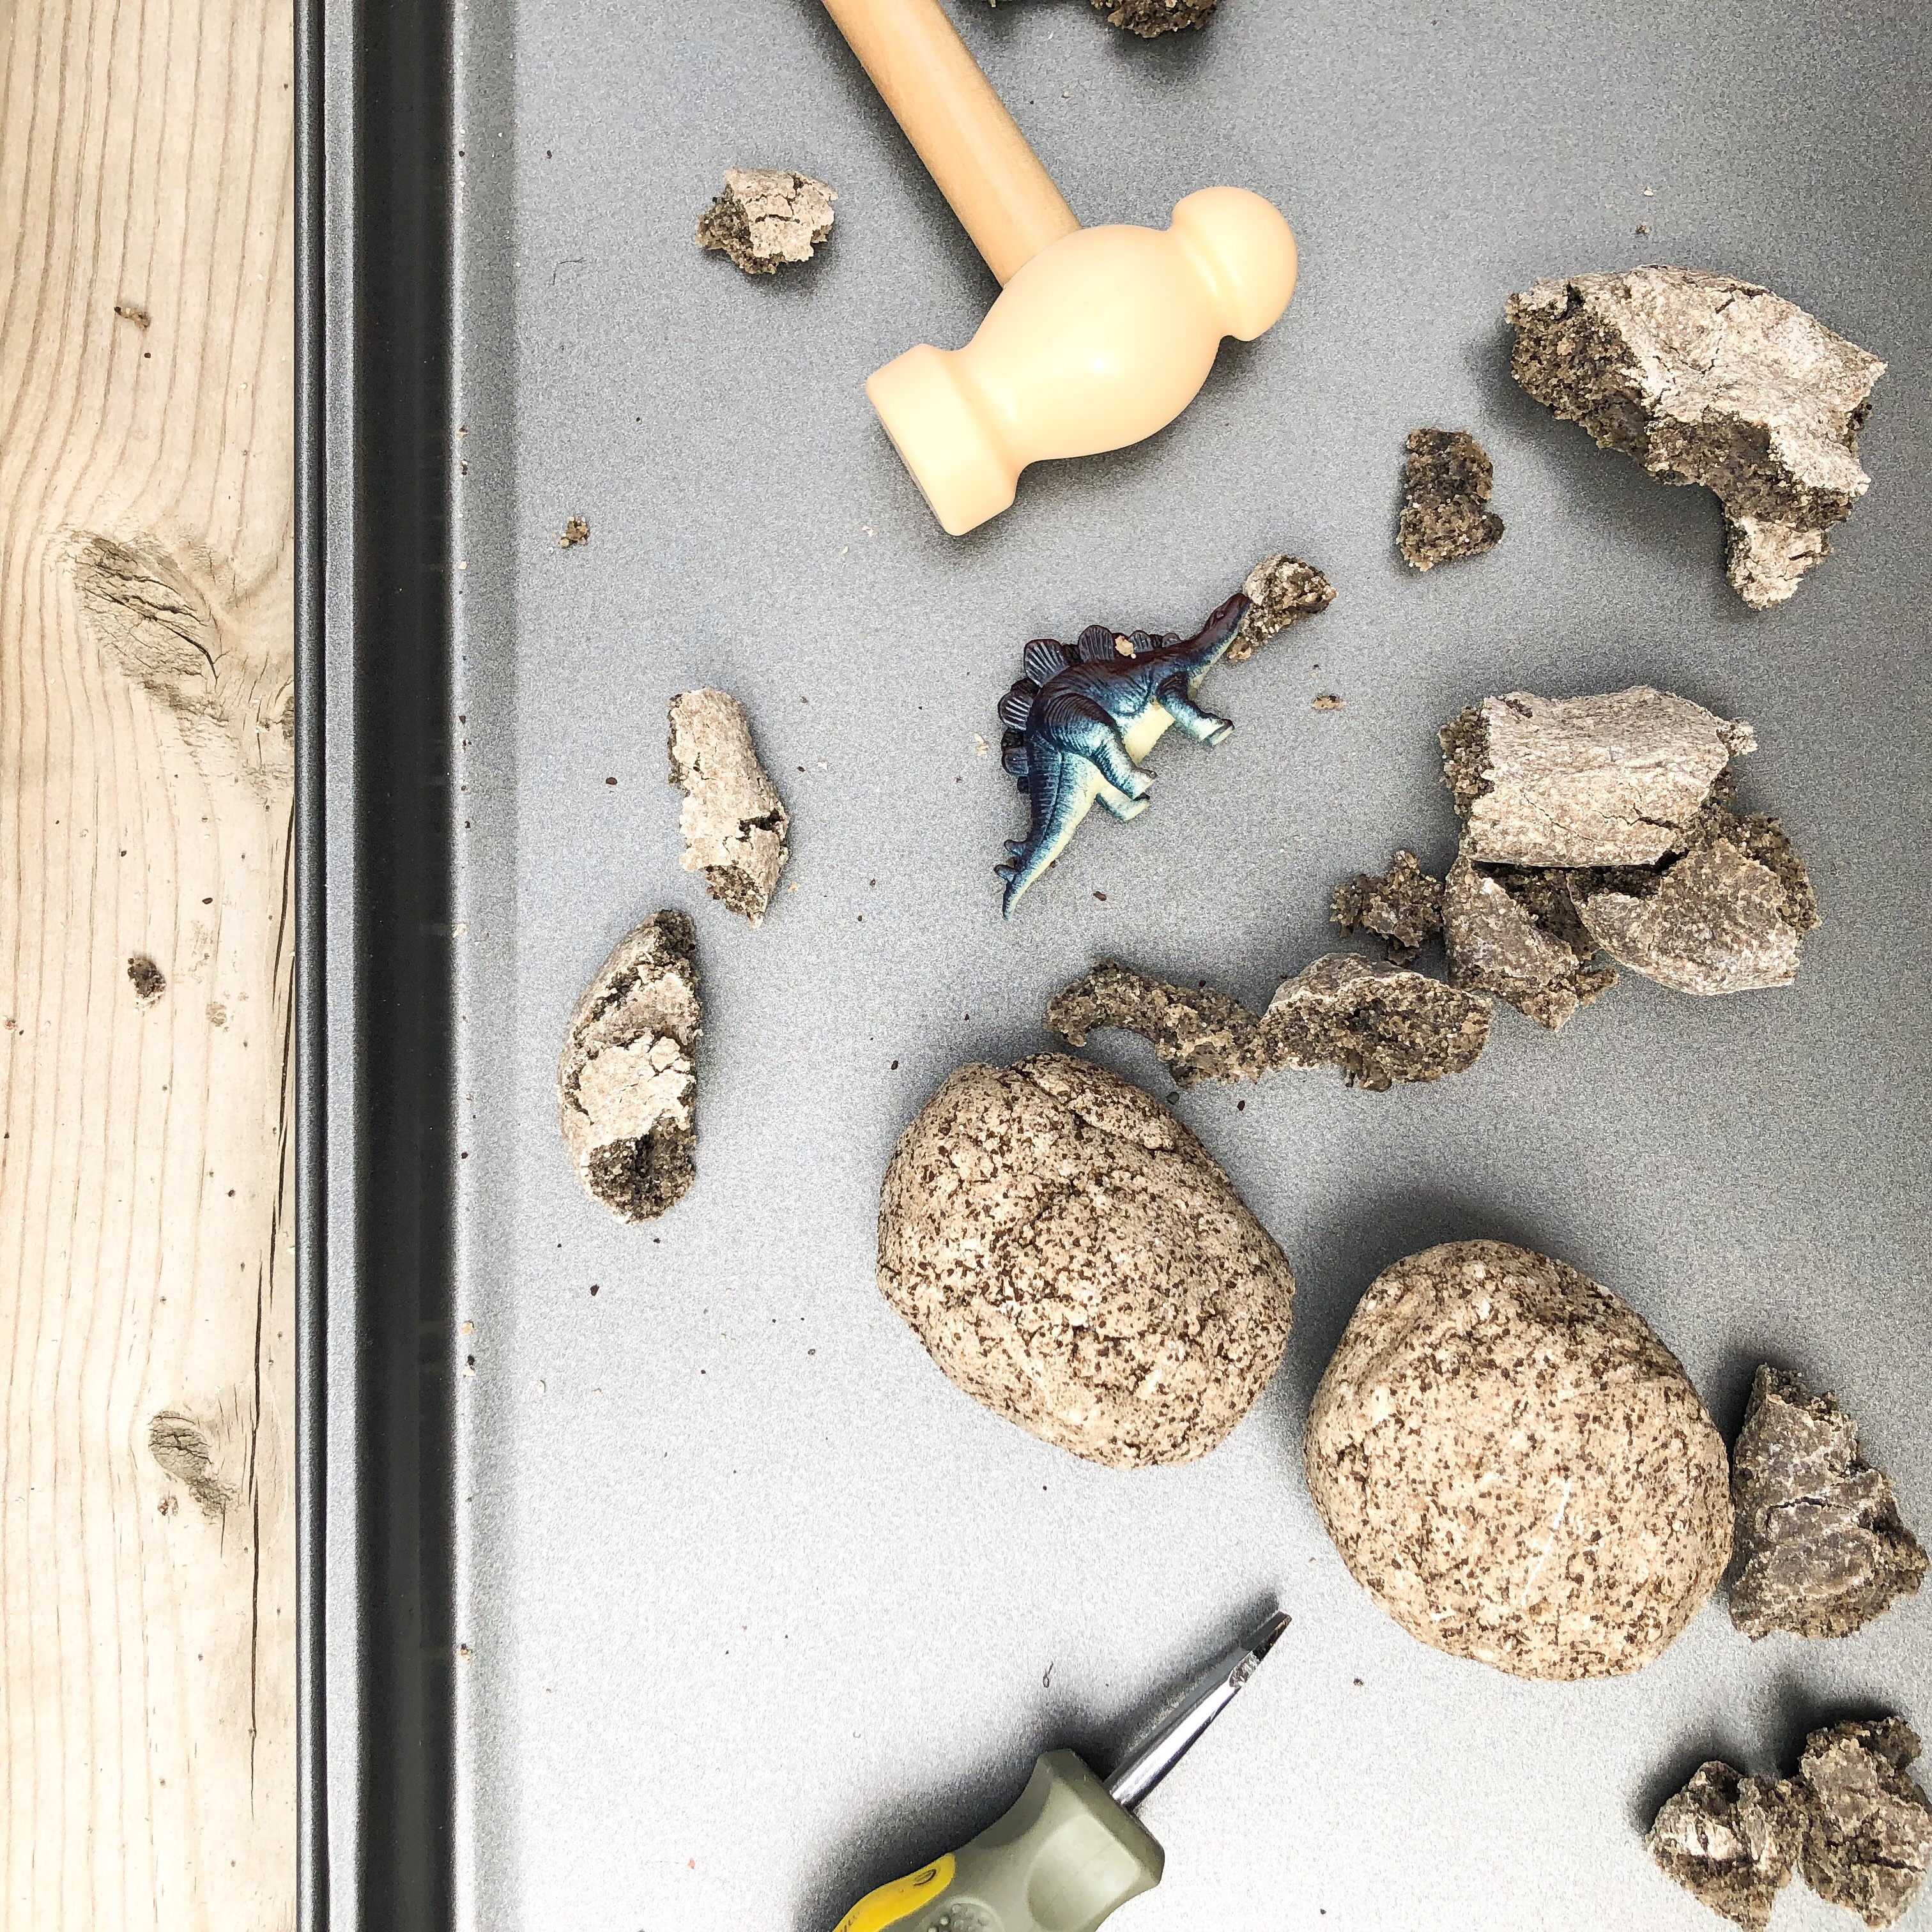
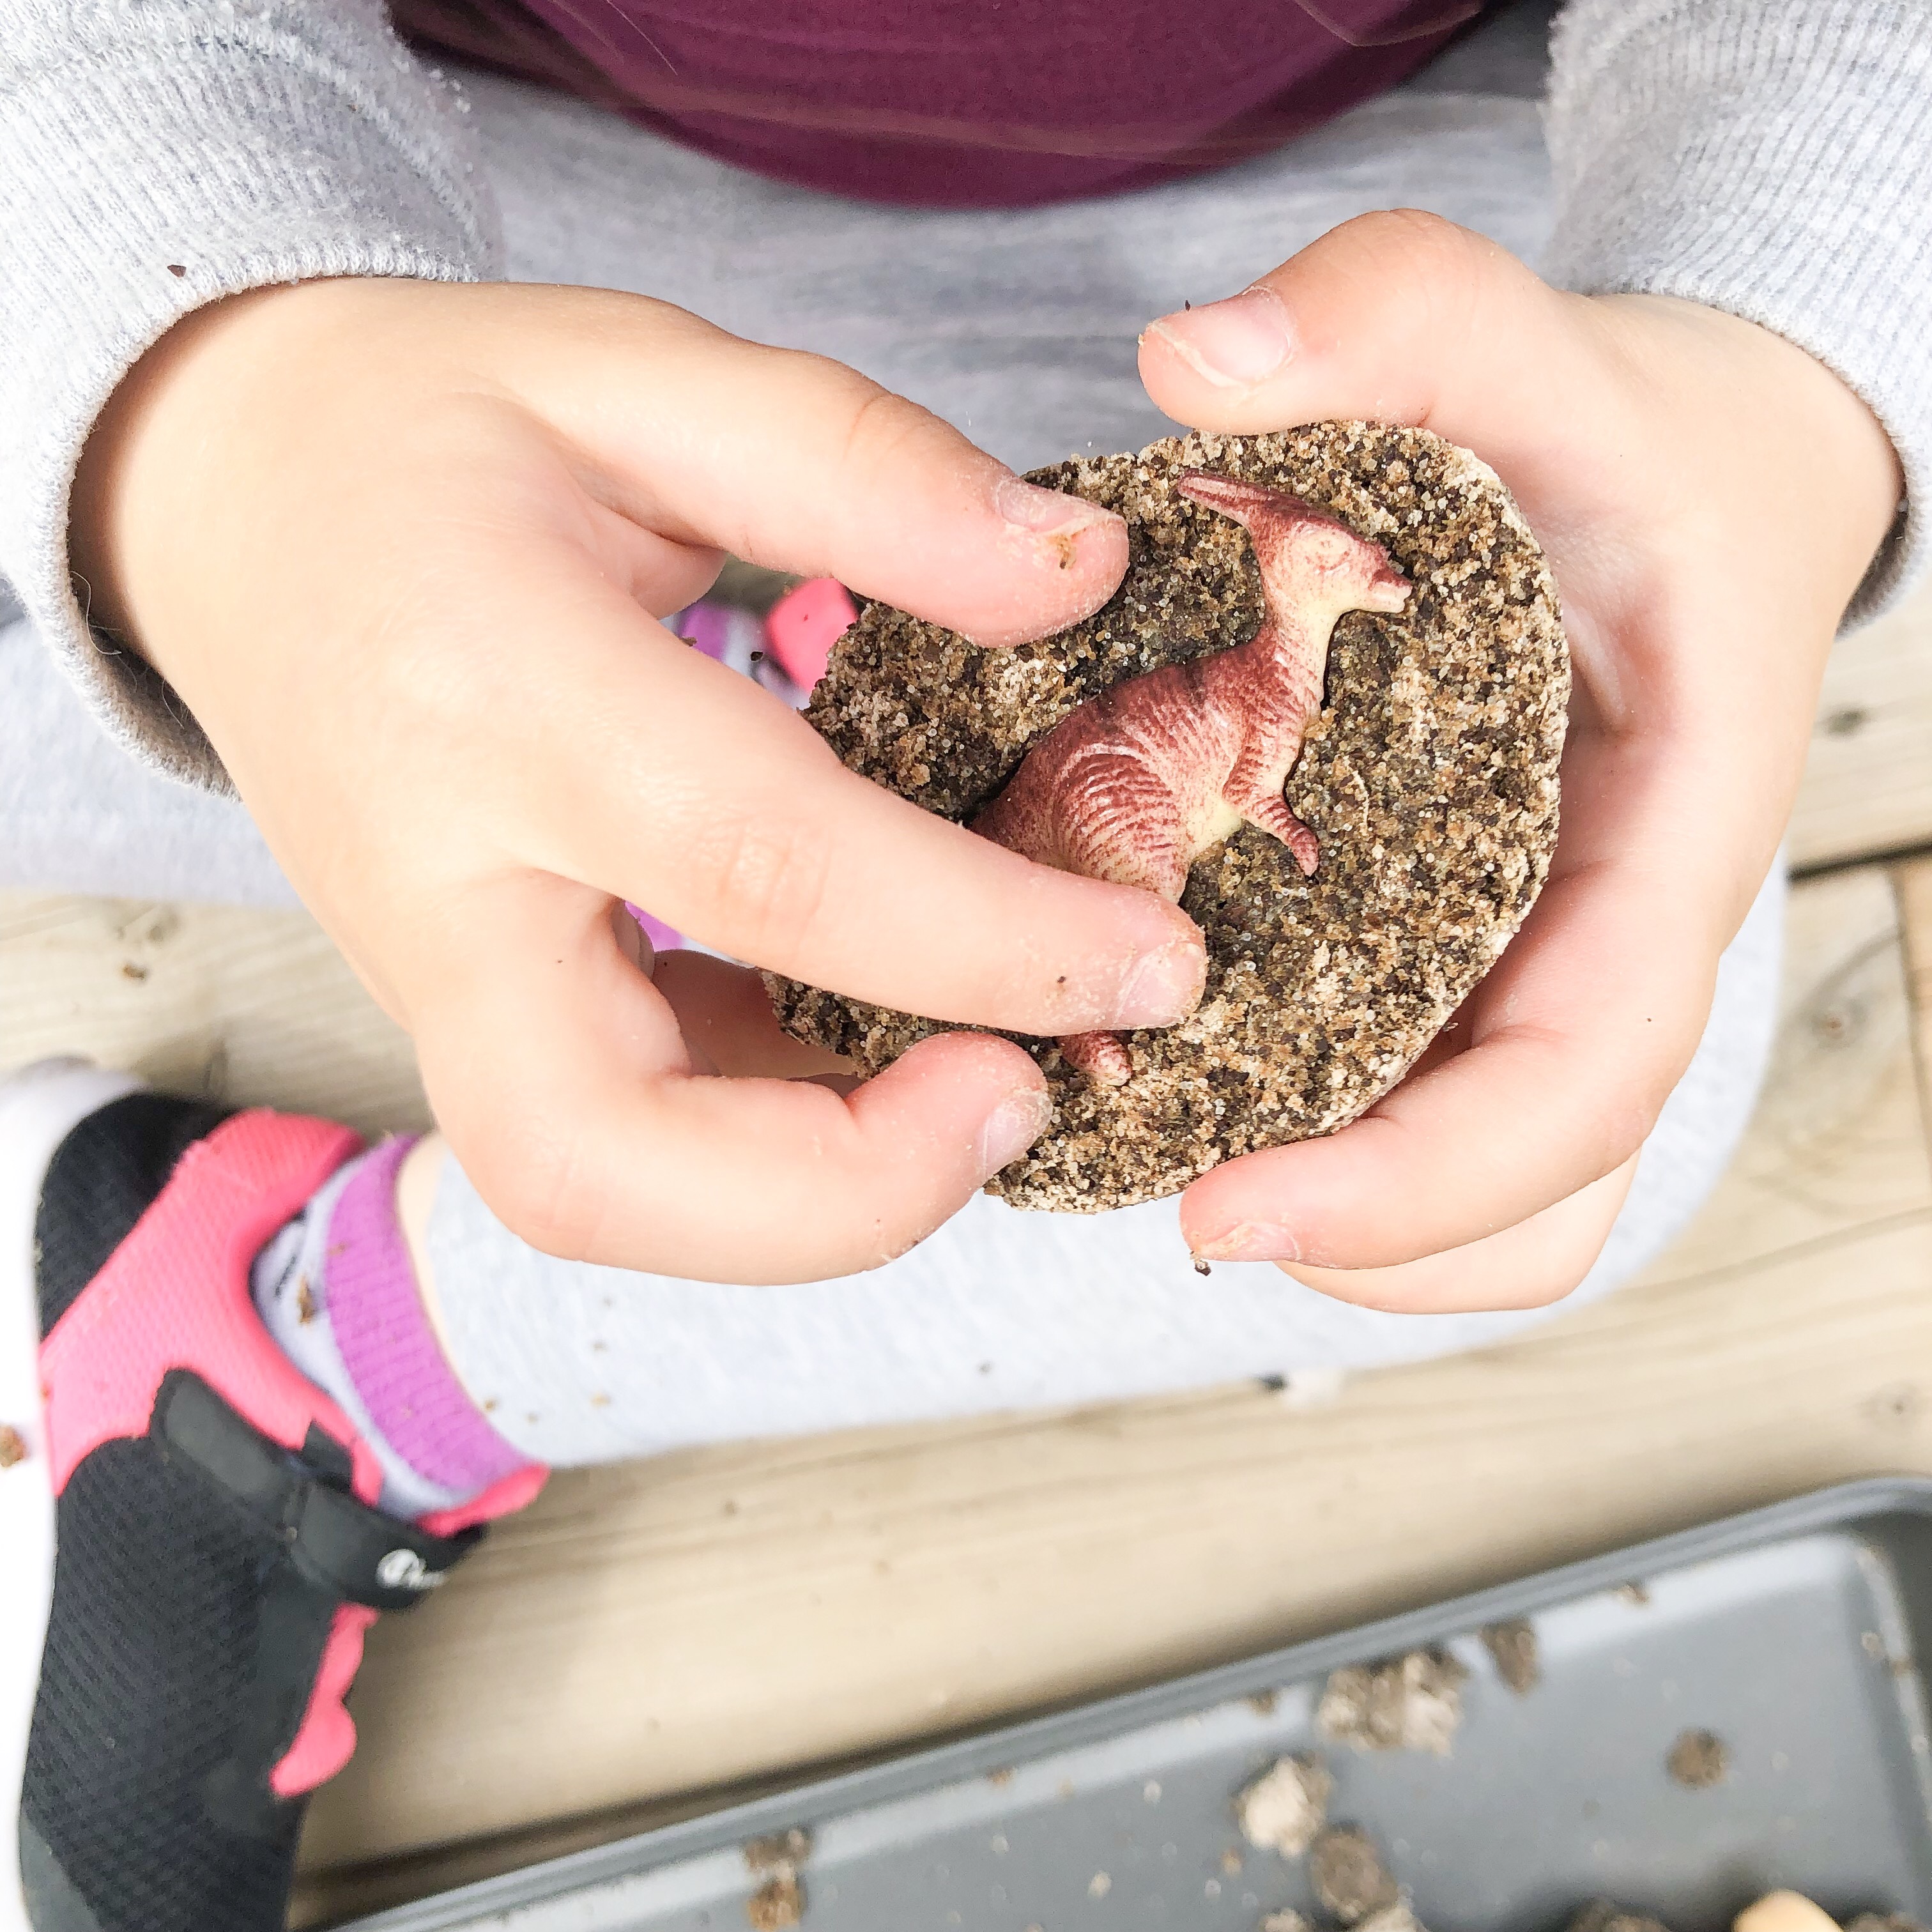
When the rocks have hardened it’s time for the fun to begin! Crack them open, or crumble the dough away to reveal the dinosaur and a fossil. I gave my daughter a small toy hammer and mini flat head screwdriver to crack the rocks open. She mostly used her hands and really enjoyed crumbling away the dough.
These dinosaur rocks would also make a great addition to a sensory bin or sand box. Want to know more about sensory bins? Check out my past blog post Why Use Sensory Bins to find out how to make your own. Don’t forget to follow me on Instagram and Pinterest for even more DIY crafts and projects you can do with your kids.